- Server = https://mirrors.tuna.tsinghua.edu.cn/msys2/msys/$arch
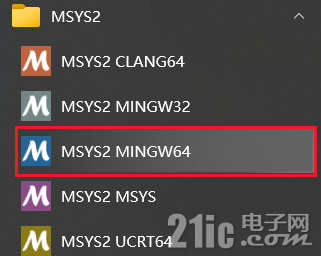
2 安装相应的依赖环境点击相应的命令行软件打开命令行窗口,这里选择“MSYS2 MINGW64”。

1. 更新MSYS2,使用以下指令更新系统文件。直至无更新内容为止。
2. 安装依赖环境,
不同的操作系统对安装的环境有些许的差异要求,一般而言不同的软件依赖包有差异的一般为64bit的标识为“x86_64”,而32bit系统一般为“i686”。其相关的Pack可以在该网址搜索到。[Base Packages - MSYS2 Packages](https://packages.msys2.org/base)
64bit:
- pacman -S libtool autoconf automake texinfo pkg-config make autogen git unzip bzip2 base-devel mingw-w64-x86_64-toolchain mingw-w64-x86_64-libusb mingw-w64-x86_64-libusb-compat-git mingw-w64-x86_64-hidapi mingw-w64-x86_64-libftdi</div><div> mingw-w64-x86_64-arm-none-eabi-gcc mingw-w64-x86_64-capstone
32bit:
- pacman -S libtool autoconf automake texinfo pkg-config make autogen git unzip bzip2 base-devel mingw-w64-i686-toolchain mingw-w64-i686-libusb mingw-w64-i686-libusb-compat-git mingw-w64-i686-hidapi mingw-w64-i686-libftdi mingw-w64-i686-capstone
3 下载与编译OpenOCD
3.1 下载OpenOCD
使用以下指令将克隆最新的OpenOCD源码至本地:
- mkdir -p ~/build; cd ~/build
- git clone https://git.code.sf.net/p/openocd/code openocd
- cd ~/build/openocd/
- ./bootstrap
如果克隆指定版本的OpenOCD(如),可以使用下面的指令:
- git clone -b 2.20.3 --depth=1 https://git.code.sf.net/p/openocd/code openocd
3.2 配置OpenOCD
使用以下指令配置OpenOCD,这里选择“--enable-ftdi”配置,其他配置(只要安装了相应的依赖)会默认开启:
- mkdir build
- cd build
- ../configure --enable-ftdi
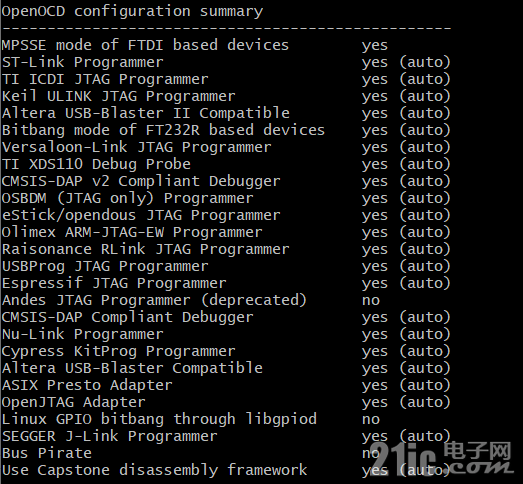
执行完以上指令后,命令行窗口会最终显示:

3.3 编译OpenOCD
使用以下指令编译OpenOCD:
编译完毕OpenOCD后就可以将相应的文件复制出来完成对OpenOCD的打包压缩了。打包的文件可以参考以下文件及文件夹内容
 openocd-v0.12.0-rc2-2022-11-22-1713.zip
(9.96 MB, 下载次数: 19)
:
- openocd-v0.12
- ├── bin
- │ ├── libftdi1-config
- │ ├── libftdi1.dll
- │ ├── libgcc_s_sjlj-1.dll
- │ ├── libhidapi-0.dll
- │ ├── libusb-1.0.dll
- │ ├── libwinpthread-1.dll
- │ └── openocd.exe
- ├── include
- │ ├── capstone
- │ │ ├── arm.h
- │ │ ├── arm64.h
- │ │ ├── capstone.h
- │ │ ├── evm.h
- │ │ ├── m680x.h
- │ │ ├── m68k.h
- │ │ ├── mips.h
- │ │ ├── platform.h
- │ │ ├── ppc.h
- │ │ ├── sparc.h
- │ │ ├── systemz.h
- │ │ ├── tms320c64x.h
- │ │ ├── x86.h
- │ │ └── xcore.h
- │ ├── hidapi
- │ │ └── hidapi.h
- │ ├── libftdi1
- │ │ └── ftdi.h
- │ └── libusb-1.0
- │ └── libusb.h
- ├── lib
- │ ├── capstone.lib
- │ ├── cmake
- │ │ └── libftdi1
- │ │ ├── LibFTDI1Config.cmake
- │ │ ├── LibFTDI1ConfigVersion.cmake
- │ │ └── UseLibFTDI1.cmake
- │ ├── libftdi1.dll.a
- │ ├── libhidapi.dll.a
- │ ├── libhidapi.la
- │ ├── libusb-1.0.dll.a
- │ ├── libusb-1.0.la
- │ └── pkgconfig
- │ ├── capstone.pc
- │ ├── hidapi.pc
- │ ├── libftdi1.pc
- │ ├── libftdipp1.pc
- │ └── libusb-1.0.pc
- └── share
- ├── doc
- │ └── hidapi
- │ ├── AUTHORS.txt
- │ ├── LICENSE-bsd.txt
- │ ├── LICENSE-gpl3.txt
- │ ├── LICENSE-orig.txt
- │ ├── LICENSE.txt
- │ └── README.md
- ├── info
- │ ├── dir
- │ ├── openocd.info
- │ ├── openocd.info-1
- │ └── openocd.info-2
- ├── man
- │ └── man1
- │ └── openocd.1
- └── openocd
- ├── contrib
- │ ├── 60-openocd.rules
- │ └── libdcc
- ├── OpenULINK
- │ └── ulink_firmware.hex
- └── scripts
- ├── bitsbytes.tcl
- ├── board
- ├── chip
- ├── cpld
- ├── cpu
- ├── fpga
- ├── interface
- ├── memory.tcl
- ├── mem_helper.tcl
- ├── mmr_helpers.tcl
- ├── target
- ├── test
- └── tools
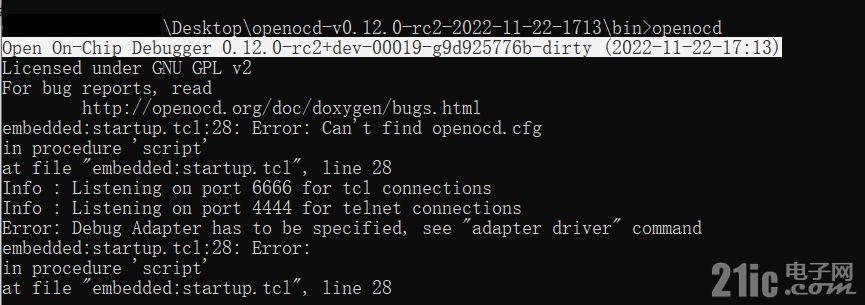
最后在openocd.exe 目录下运行CMD,输入openocd按下回车即可看到相应的运行信息:

作者: chenjun89 时间: 2022-12-3 18:19
不错,get一项新技能。
作者: lindahnu 时间: 2024-1-15 14:51
这里编译生成的是不是只支持ARM核的?如果要支持RISC-V,该怎么做啊?
作者: lindahnu 时间: 2024-1-15 17:33
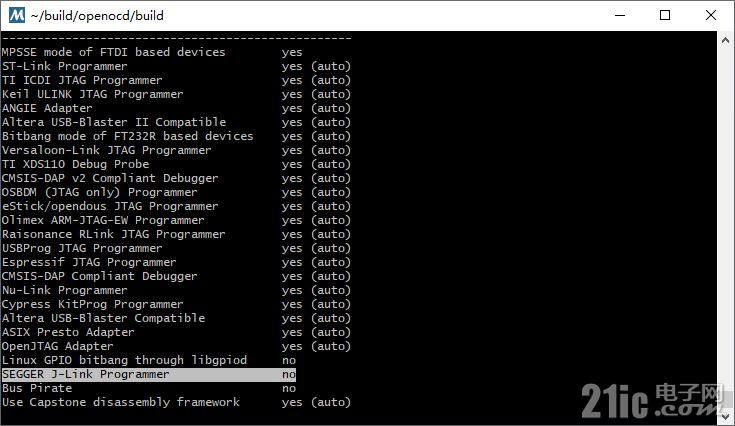
在执行到../configure --enable-ftdi后发现 SEGGER J-Link Programmer 为 nomake install完成后:
bin文件夹缺少了libgcc_s_sjlj-1.dll;
lib文件夹缺少capstone.lib,libhidapi.la,libusb-1.0.la;
doc文件夹下缺少hidapi;
前面已经安装了所有依赖库了,请问是哪里不对呢?求楼主解答指点!!!
pacman -S libtool autoconf automake texinfo pkg-config make autogen git unzip bzip2 base-devel mingw-w64-x86_64-toolchain mingw-w64-x86_64-libusb mingw-w64-x86_64-libusb-compat-git mingw-w64-x86_64-hidapi mingw-w64-x86_64-libftdi mingw-w64-x86_64-arm-none-eabi-gcc mingw-w64-x86_64-capstone
-

| 欢迎光临 21ic电子技术开发论坛 (https://bbs.21ic.com/) |
Powered by Discuz! X3.5 |


 openocd-v0.12.0-rc2-2022-11-22-1713.zip
(9.96 MB, 下载次数: 19)

