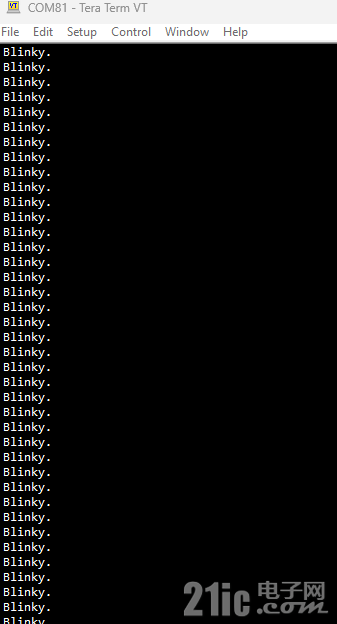
在上一篇GPIO点灯成功后,如何串口打印相应的信息来辅助后续调试?
答案是一行代码。
转到函数定义:
- /**
- * [url=home.php?mod=space&uid=247401]@brief[/url] initialize uart
- * @param baudrate: uart baudrate
- * @retval none
- */
- void uart_print_init(uint32_t baudrate)
- {
- gpio_init_type gpio_init_struct;
- #if defined (__GNUC__) && !defined (__clang__)
- setvbuf(stdout, NULL, _IONBF, 0);
- #endif
- /* enable the uart and gpio clock */
- crm_periph_clock_enable(PRINT_UART_CRM_CLK, TRUE);
- crm_periph_clock_enable(PRINT_UART_TX_GPIO_CRM_CLK, TRUE);
- gpio_default_para_init(&gpio_init_struct);
- /* configure the uart tx pin */
- gpio_init_struct.gpio_drive_strength = GPIO_DRIVE_STRENGTH_STRONGER;
- gpio_init_struct.gpio_out_type = GPIO_OUTPUT_PUSH_PULL;
- gpio_init_struct.gpio_mode = GPIO_MODE_MUX;
- gpio_init_struct.gpio_pins = PRINT_UART_TX_PIN;
- gpio_init_struct.gpio_pull = GPIO_PULL_NONE;
- gpio_init(PRINT_UART_TX_GPIO, &gpio_init_struct);
- gpio_pin_mux_config(PRINT_UART_TX_GPIO, PRINT_UART_TX_PIN_SOURCE, PRINT_UART_TX_PIN_MUX_NUM);
- /* configure uart param */
- usart_init(PRINT_UART, baudrate, USART_DATA_8BITS, USART_STOP_1_BIT);
- usart_transmitter_enable(PRINT_UART, TRUE);
- usart_enable(PRINT_UART, TRUE);
- }
烧录下载:

接下来增加I2C相关的测试代码。L021开发板上提供了Arduino接口,有SCL, SDA 分别是PB8与PB9.
这里借用网友的代码,来测试一下开发板能否检测到OLED这个I2C设备。
- **
- * @}
- */
- /* Scans for I2C client devices on the bus - that have an address within the
- *specified range [addr_min, addr_max]
- */
- void simple_i2c_scan(uint8_t addr_min, uint8_t addr_max) {
- uint8_t client_address;
- uint8_t client_addr_str[5] = { 0 };
- static uint8_t IIC_Client_Num = 0;
- printf("\r\n I2C Scan started from 0x%02X to 0x%02X:", addr_min, addr_max);
- //LCD_ShowString(0,35,"I2C Client:",RED,WHITE,12,0);
- for (client_address = addr_min; client_address <= addr_max; client_address++) {
- printf("\r\n Scanning client address = 0x%02X", (int)client_address);
- /* start the request reception process */
- //I2C_Send7bitAddress(I2C1, client_address, I2C_Direction_Transmitter);
- if ((i2c_status = i2c_master_transmit(&hi2cx, client_address, &client_address, 1, I2C_TIMEOUT)) == I2C_OK) {
- printf("\r\n---- --> client (0x%02X) ACKED <-- ------ ", (int)client_address);
- client_addr_str[0] = '0';
- client_addr_str[1] = 'x';
- if (client_address / 16 >= 10)
- client_addr_str[2] = client_address / 16 - 10 + 'A';
- else
- client_addr_str[2] = client_address / 16 + '0';
- if (client_address % 16 >= 10)
- client_addr_str[3] = client_address % 16 - 10 + 'A';
- else
- client_addr_str[3] = client_address % 16 + '0';
- client_addr_str[4] = '\0';
- IIC_Client_Num++;
- printf("Yes, I2C Device found. Device Addr: %s", client_addr_str);
- } else {
- continue;
- }
- delay_ms(50);
- } //<--for--loop>
- printf("\r\n ----------------- I2C Scan ended -----------------");
- }
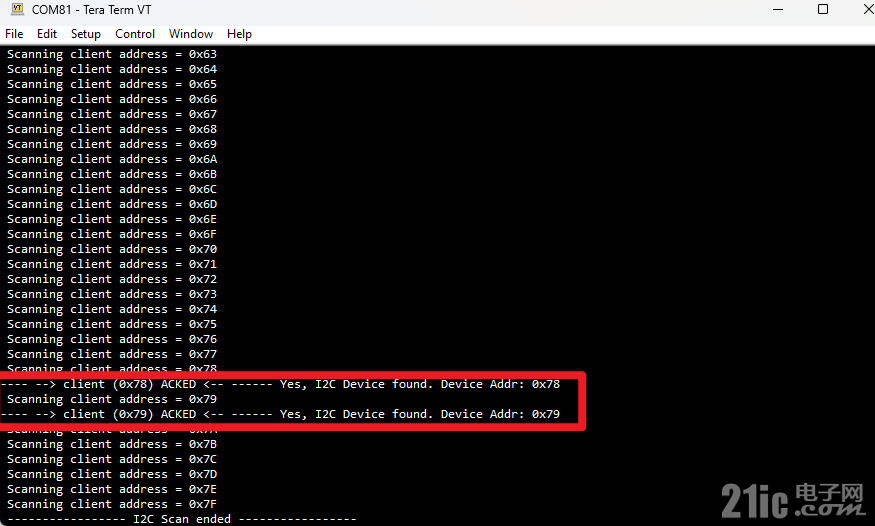
串口打印结果:

可见OLED被检测到了。
0x78 : 0'b 0111_1000
0x79: 0'b 0111_1001
对应的7位地址是相同的,0'b 011_1100,即0x3C。上面地址最后一位分别代表 写地址与读地址。
后面会继续来尝试驱动OLED,使用硬件I2C。
|