|
[color=rgba(0, 0, 0, 0.87)]上一章节中配置 NPU 扩展包后可以在 menuconfig 里看到两个 Demo 测试应用程序。这里我们来介绍一下怎么使用这两个 Demo。 [color=rgba(0, 0, 0, 0.87)] [color=var(--md-typeset-a-color)]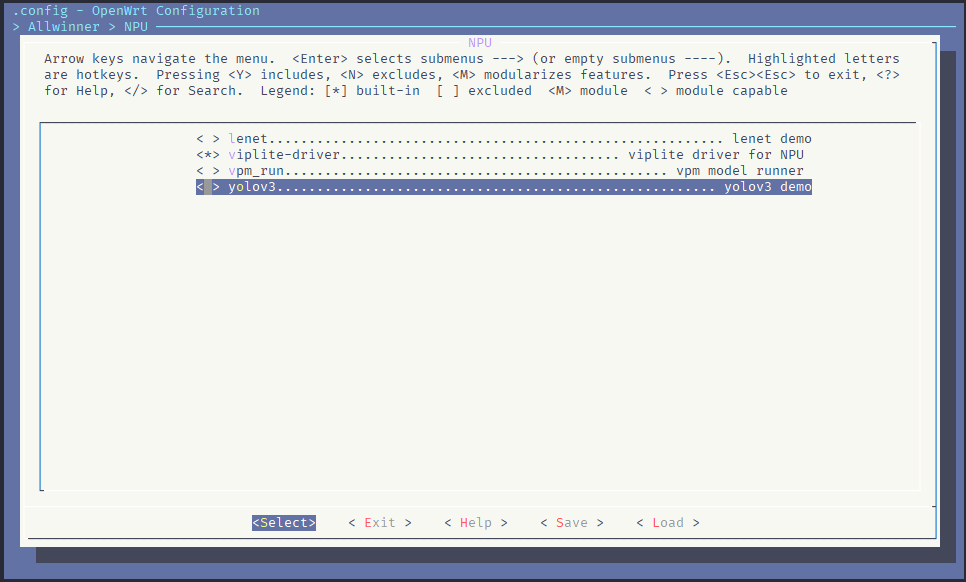 [color=rgba(0, 0, 0, 0.87)]在 NPU Package 中我们提供了一个较为完整的 YOLOV3 Demo 作为测试,程序源码位于: code" style="box-sizing: inherit; -webkit-tap-highlight-color: transparent; font-size: inherit; font-family: inherit; background-image: initial; background-position: initial; background-size: initial; background-repeat: initial; background-attachment: initial; background-origin: initial; background-clip: initial; border-width: 0px; border-style: initial; border-color: initial; position: absolute; top: 0.5em; right: 0.5em; z-index: 1; width: 1.5em; height: 1.5em; border-radius: 0.1rem; outline: none; outline-offset: 0.1rem; cursor: pointer; transition: color 0.25s ease 0s;">openwrt/package/npu/yolov3/src[color=rgba(0, 0, 0, 0.87)]这个 Demo 相较于 Lenet 的 Demo 增加了图片前处理、数据处理、后处理与图片打框的功能。可以将上传的图片物体打框标记并输出打框后的图片。 [color=rgba(0, 0, 0, 0.87)]首先我们在 menuconfig 里选中 YOLOV3 的相关选项 [color=rgba(0, 0, 0, 0.87)] [color=var(--md-typeset-a-color)] [color=rgba(0, 0, 0, 0.87)]可以看到这里选择了 yolov3 会出现 yolov3-model 这个选项,这个选项是提供一个测试使用的模型到系统中,文件较大,如果编译打包出现错误请参阅【[color=var(--md-typeset-a-color)]FAQ 常见问题 - V853】查看或参考以下解决方法。 [color=rgba(0, 0, 0, 0.87)]报错时的错误提示: [color=rgba(0, 0, 0, 0.87)] [color=var(--md-typeset-a-color)] [color=rgba(0, 0, 0, 0.87)]解决方法:修改板级目录下面的 sys_partition.fex 的 rootfs.fex 节点 45360 ==> 95744 。 [color=rgba(0, 0, 0, 0.87)] [color=var(--md-typeset-a-color)] [color=rgba(0, 0, 0, 0.87)]首先我们准备一张图片,并把图片转换为 416*416 分辨率的图片。 [color=rgba(0, 0, 0, 0.87)] [color=var(--md-typeset-a-color)]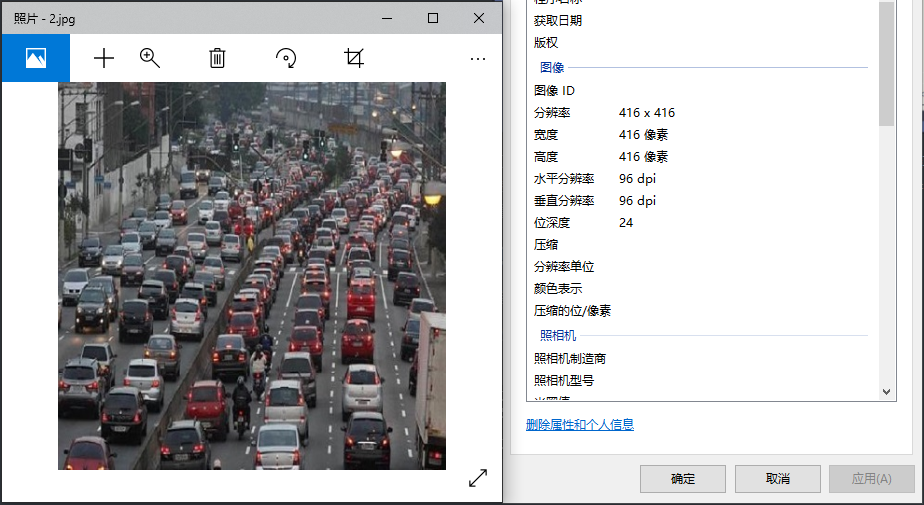 [color=rgba(0, 0, 0, 0.87)]使用 ADB 将图片下载到 root 目录 code" style="box-sizing: inherit; -webkit-tap-highlight-color: transparent; font-size: inherit; font-family: inherit; background-image: initial; background-position: initial; background-size: initial; background-repeat: initial; background-attachment: initial; background-origin: initial; background-clip: initial; border-width: 0px; border-style: initial; border-color: initial; position: absolute; top: 0.5em; right: 0.5em; z-index: 1; width: 1.5em; height: 1.5em; border-radius: 0.1rem; outline: none; outline-offset: 0.1rem; cursor: pointer; transition: color 0.25s ease 0s;">adb push 2.jpg root[color=rgba(0, 0, 0, 0.87)] [color=var(--md-typeset-a-color)] [color=rgba(0, 0, 0, 0.87)]在开发板上,切换文件夹到 root 文件夹,使用 ls 列出看看有没有 2.jpg 这个图片文件 code" style="box-sizing: inherit; -webkit-tap-highlight-color: transparent; font-size: inherit; font-family: inherit; background-image: initial; background-position: initial; background-size: initial; background-repeat: initial; background-attachment: initial; background-origin: initial; background-clip: initial; border-width: 0px; border-style: initial; border-color: initial; position: absolute; top: 0.5em; right: 0.5em; z-index: 1; width: 1.5em; height: 1.5em; border-radius: 0.1rem; outline: none; outline-offset: 0.1rem; cursor: pointer; transition: color 0.25s ease 0s;">cd /rootls[color=rgba(0, 0, 0, 0.87)] [color=var(--md-typeset-a-color)] [color=rgba(0, 0, 0, 0.87)]可以看到,这里已经下载成功了,接下来运行 yolov3,格式是: code" style="box-sizing: inherit; -webkit-tap-highlight-color: transparent; font-size: inherit; font-family: inherit; background-image: initial; background-position: initial; background-size: initial; background-repeat: initial; background-attachment: initial; background-origin: initial; background-clip: initial; border-width: 0px; border-style: initial; border-color: initial; position: absolute; top: 0.5em; right: 0.5em; z-index: 1; width: 1.5em; height: 1.5em; border-radius: 0.1rem; outline: none; outline-offset: 0.1rem; cursor: pointer; transition: color 0.25s ease 0s;">yolov3 <模型文件> <图片文件>[color=rgba(0, 0, 0, 0.87)]之前我们选中了 yolov3-model 模型包,模型已经安装到/etc/models/yolov3_model.nb了,所以在这里我们直接可以使用这个模型,执行 code" style="box-sizing: inherit; -webkit-tap-highlight-color: transparent; font-size: inherit; font-family: inherit; background-image: initial; background-position: initial; background-size: initial; background-repeat: initial; background-attachment: initial; background-origin: initial; background-clip: initial; border-width: 0px; border-style: initial; border-color: initial; position: absolute; top: 0.5em; right: 0.5em; z-index: 1; width: 1.5em; height: 1.5em; border-radius: 0.1rem; outline: none; outline-offset: 0.1rem; cursor: pointer; transition: color 0.25s ease 0s;">yolov3 /etc/models/yolov3_model.nb 2.jpg[color=rgba(0, 0, 0, 0.87)] [color=var(--md-typeset-a-color)]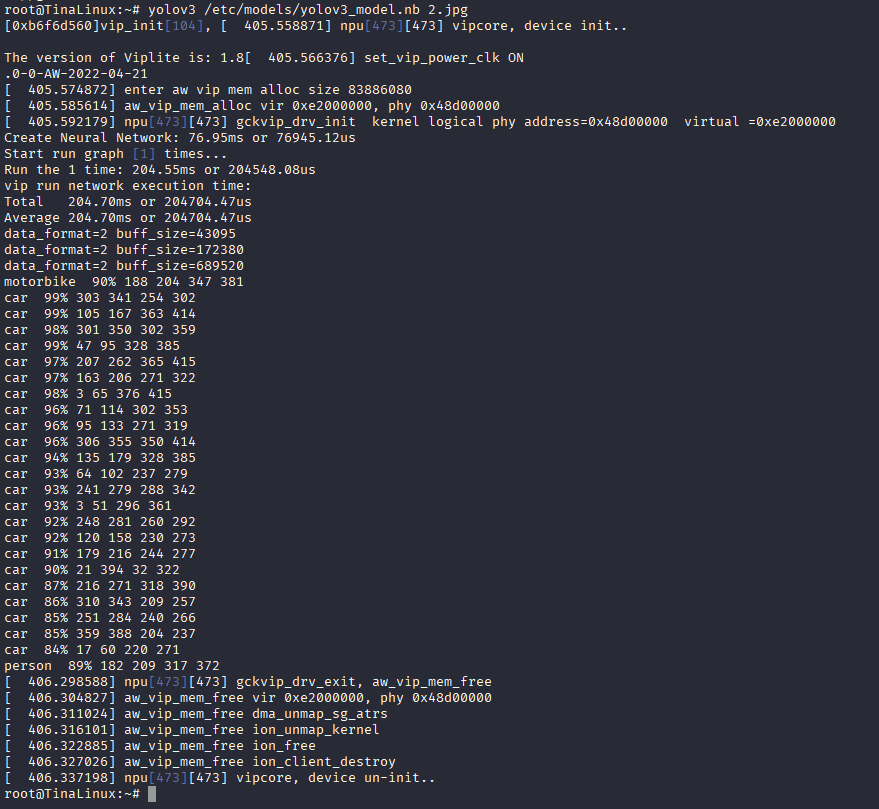 [color=rgba(0, 0, 0, 0.87)]可以看到识别到了 car和motorbike ,此时 ls 可以看到打标完成的图片 yolo_v3_output.bmp [color=rgba(0, 0, 0, 0.87)] [color=var(--md-typeset-a-color)] [color=rgba(0, 0, 0, 0.87)]可以使用 adb 上传图片到主机查看。 code" style="box-sizing: inherit; -webkit-tap-highlight-color: transparent; font-size: inherit; font-family: inherit; background-image: initial; background-position: initial; background-size: initial; background-repeat: initial; background-attachment: initial; background-origin: initial; background-clip: initial; border-width: 0px; border-style: initial; border-color: initial; position: absolute; top: 0.5em; right: 0.5em; z-index: 1; width: 1.5em; height: 1.5em; border-radius: 0.1rem; outline: none; outline-offset: 0.1rem; cursor: pointer; transition: color 0.25s ease 0s;">adb pull /root/yolo_v3_output.bmp[color=rgba(0, 0, 0, 0.87)] [color=var(--md-typeset-a-color)] [color=rgba(0, 0, 0, 0.87)]打开图片即可查看标注情况 [color=rgba(0, 0, 0, 0.87)] [color=var(--md-typeset-a-color)]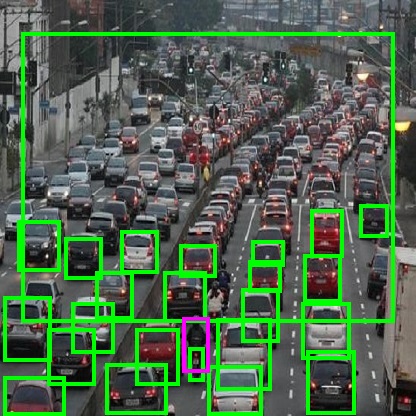 [color=rgba(0, 0, 0, 0.87)]如果运行出现错误,请确认图片格式是否为jpg,图片分辨率是否为 416x416 code" style="box-sizing: inherit; -webkit-tap-highlight-color: transparent; font-size: inherit; font-family: inherit; background-image: initial; background-position: initial; background-size: initial; background-repeat: initial; background-attachment: initial; background-origin: initial; background-clip: initial; border-width: 0px; border-style: initial; border-color: initial; position: absolute; top: 0.5em; right: 0.5em; z-index: 1; width: 1.5em; height: 1.5em; border-radius: 0.1rem; outline: none; outline-offset: 0.1rem; cursor: pointer; transition: color 0.25s ease 0s;">Error: Input size mismatch for 2.jpg, file data size:516672, expected:519168[color=rgba(0, 0, 0, 0.87)] [color=var(--md-typeset-a-color)]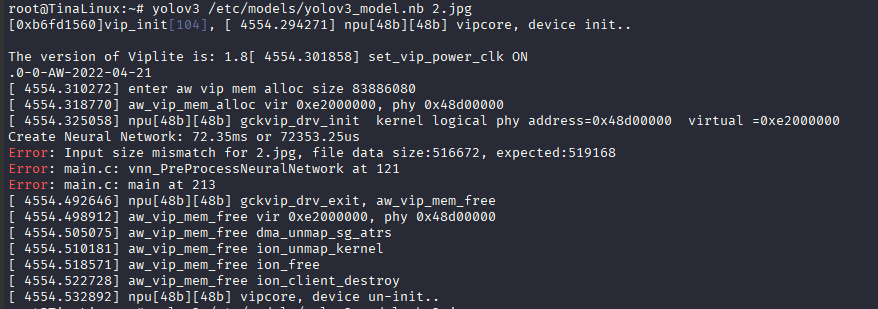 [color=rgba(0, 0, 0, 0.87)]如果说深度学习有什么 HelloWorld,那一定是 Lenet。 [color=rgba(0, 0, 0, 0.87)]在 NPU 扩展包中提供了一个 Lenet 的 Demo 程序。 [color=rgba(0, 0, 0, 0.87)]这个 Demo 较为基础,演示了模型转换生成的模板代码如何集成到 Tina Linux 里。由于没有前处理与后处理,所以输入数据与输出数据均为二进制 tensor 文件。也正因为如此,所以可以将输出的 tensor 与仿真输出的 tensor 进行对比,验证是否有错误。 [color=rgba(0, 0, 0, 0.87)]如果想要更完善的包括前处理与后处理的 Demo 可以查看 yolov3 Demo。 [color=rgba(0, 0, 0, 0.87)]我们先 make menuconfig 找到 Lenet 选项,这里提供 lenet 主程序与 lenet-model 模型两个包,可以只选中主程序使用自己转换的模型测试。 [color=rgba(0, 0, 0, 0.87)] [color=var(--md-typeset-a-color)] [color=rgba(0, 0, 0, 0.87)]在这里我们就使用扩展包提供的模型进行验证。先去 扩展包里找到测试数据 lenet_input_0.dat 并上传到开发板。 [color=rgba(0, 0, 0, 0.87)] [color=var(--md-typeset-a-color)]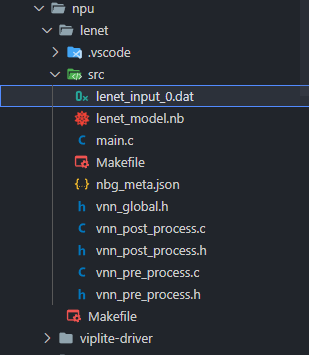 [color=rgba(0, 0, 0, 0.87)]使用 ls 列出上传的数据 [color=rgba(0, 0, 0, 0.87)] [color=var(--md-typeset-a-color)] [color=rgba(0, 0, 0, 0.87)]使用 lenet 命令运行测试模型 code" style="box-sizing: inherit; -webkit-tap-highlight-color: transparent; font-size: inherit; font-family: inherit; background-image: initial; background-position: initial; background-size: initial; background-repeat: initial; background-attachment: initial; background-origin: initial; background-clip: initial; border-width: 0px; border-style: initial; border-color: initial; position: absolute; top: 0.5em; right: 0.5em; z-index: 1; width: 1.5em; height: 1.5em; border-radius: 0.1rem; outline: none; outline-offset: 0.1rem; cursor: pointer; transition: color 0.25s ease 0s;">lenet <模型文件> <数据文件> code" style="box-sizing: inherit; -webkit-tap-highlight-color: transparent; font-size: inherit; font-family: inherit; background-image: initial; background-position: initial; background-size: initial; background-repeat: initial; background-attachment: initial; background-origin: initial; background-clip: initial; border-width: 0px; border-style: initial; border-color: initial; position: absolute; top: 0.5em; right: 0.5em; z-index: 1; width: 1.5em; height: 1.5em; border-radius: 0.1rem; outline: none; outline-offset: 0.1rem; cursor: pointer; transition: color 0.25s ease 0s;">lenet /etc/models/lenet_model.nb lenet_input_0.dat[color=rgba(0, 0, 0, 0.87)] [color=var(--md-typeset-a-color)] [color=rgba(0, 0, 0, 0.87)]可以看到这里输出了 tensor output0_10_1.dat 文件 [color=rgba(0, 0, 0, 0.87)] [color=var(--md-typeset-a-color)] [color=rgba(0, 0, 0, 0.87)]如果需要实现图片的输入与输出,需要基于这个模板增加图片前处理与数据后处理部分的代码。前处理将图片转为 tensor 输入,后处理解析 tensor 输出数据。 vpm_run[color=rgba(0, 0, 0, 0.87)]vpm_run 软件包是用于在开发板上测试运行的工具,一般用于开发板测试推理。而且可以通过参考 vpm_run 的流程,用户可以开发自己的 AI 应用程序,所以它可以看成是一套基于 AI 应用开发模板,只不过,它有自己的一些特点, vpm_run 是可以作为一个通用模型运行环境,程序不需要修改,可以运行任何部署正确的NBG 模型文件. vpm_run 基于 viplite 网络层 API,程序短小精悍。 vpm_run 具备默认的后处理程序 TOP5, 如果不满足你的算法要求,可以自行扩展。
[color=rgba(0, 0, 0, 0.87)]我们先 make menuconfig 找到 vpm_run 选项,勾选,打包编译。这里我们同样勾选 lenet 选项,待会测试 vpm_run 使用,提供模型。 [color=rgba(0, 0, 0, 0.87)] [color=var(--md-typeset-a-color)]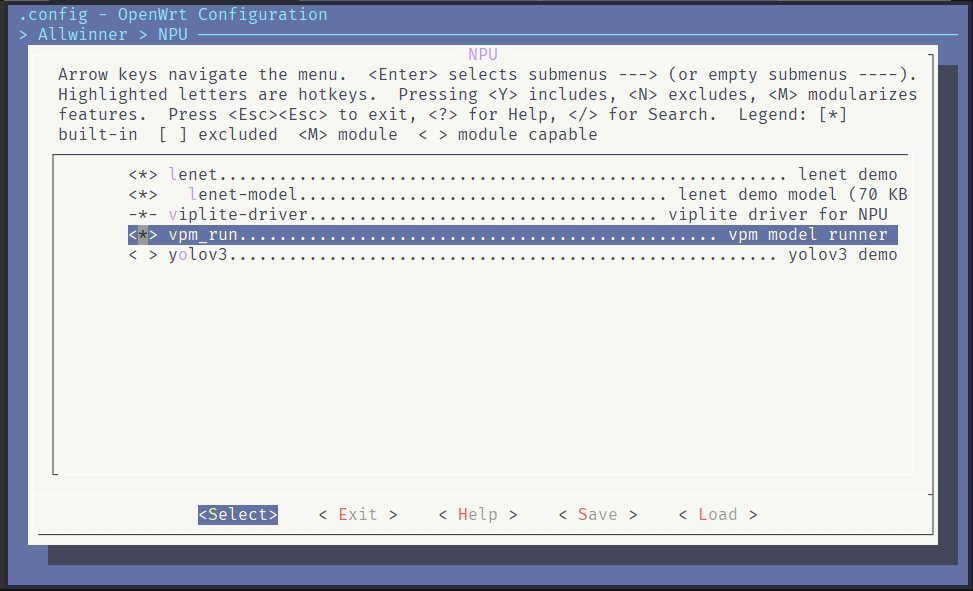 [color=rgba(0, 0, 0, 0.87)]在开发板中,可以运行 vpm_run 查看支持的操作 code" style="box-sizing: inherit; -webkit-tap-highlight-color: transparent; font-size: inherit; font-family: inherit; background-image: initial; background-position: initial; background-size: initial; background-repeat: initial; background-attachment: initial; background-origin: initial; background-clip: initial; border-width: 0px; border-style: initial; border-color: initial; position: absolute; top: 0.5em; right: 0.5em; z-index: 1; width: 1.5em; height: 1.5em; border-radius: 0.1rem; outline: none; outline-offset: 0.1rem; cursor: pointer; transition: color 0.25s ease 0s;">vpm_run[color=rgba(0, 0, 0, 0.87)] [color=var(--md-typeset-a-color)] [color=rgba(0, 0, 0, 0.87)]可以看到,他需要一个 sample.txt 文件,定义如下 code" style="box-sizing: inherit; -webkit-tap-highlight-color: transparent; font-size: inherit; font-family: inherit; background-image: initial; background-position: initial; background-size: initial; background-repeat: initial; background-attachment: initial; background-origin: initial; background-clip: initial; border-width: 0px; border-style: initial; border-color: initial; position: absolute; top: 0.5em; right: 0.5em; z-index: 1; width: 1.5em; height: 1.5em; border-radius: 0.1rem; outline: none; outline-offset: 0.1rem; cursor: pointer; transition: color 0.25s ease 0s;">[network] # 模型的名称./lenet_model.nb[input] # 输入数据./lenet_input_0.dat[golden] # 标准输出数据,会与输出数据比对检查是否有偏差(可选)./lenet_input_golden.dat[output] # 输出数据./lenet_output_data.dat[color=rgba(0, 0, 0, 0.87)]其中的 golden 标签代表的是标准输入,可以看作一个满分的输出,这个输出可以用预推理阶段生成的输出文件,也可以用仿真输出的文件。vpm_run 会比对这两个文件查看是否有错误产生。 code" style="box-sizing: inherit; -webkit-tap-highlight-color: transparent; font-size: inherit; font-family: inherit; background-image: initial; background-position: initial; background-size: initial; background-repeat: initial; background-attachment: initial; background-origin: initial; background-clip: initial; border-width: 0px; border-style: initial; border-color: initial; position: absolute; top: 0.5em; right: 0.5em; z-index: 1; width: 1.5em; height: 1.5em; border-radius: 0.1rem; outline: none; outline-offset: 0.1rem; cursor: pointer; transition: color 0.25s ease 0s;">vpm_run sample.txt[color=rgba(0, 0, 0, 0.87)]有些模型需要的内存较大,需要修改更大的内存,可以打开 openwrt/package/npu/vpm_run/src/vpm_run.c 修改分配的内存大小(viip_init(内存大小))。 [color=rgba(0, 0, 0, 0.87)] [color=var(--md-typeset-a-color)]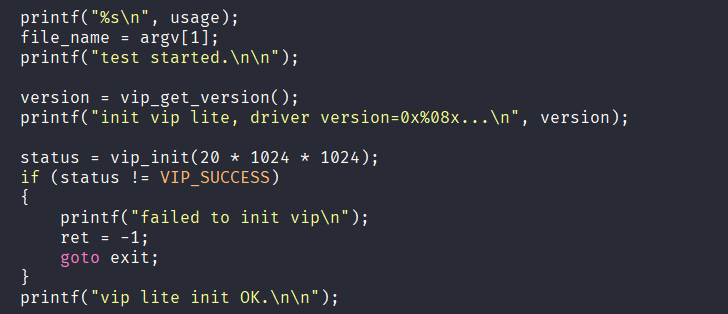 [color=rgba(0, 0, 0, 0.87)]多输入sample.txt文件配置,当只有一个nb模型但需要有两个输入时: [color=rgba(0, 0, 0, 0.87)]``` [network] ./network_binary.nb [input] ./iter_0_images_262_out0_1_3_640_640.tensor ./input_0.dat code" style="box-sizing: inherit; -webkit-tap-highlight-color: transparent; font-size: inherit; font-family: inherit; background-image: initial; background-position: initial; background-size: initial; background-repeat: initial; background-attachment: initial; background-origin: initial; background-clip: initial; border-width: 0px; border-style: initial; border-color: initial; position: absolute; top: 0.5em; right: 0.5em; z-index: 1; width: 1.5em; height: 1.5em; border-radius: 0.1rem; outline: none; outline-offset: 0.1rem; cursor: pointer; transition: color 0.25s ease 0s;">多网络sample.txt文件配置,当需要一次运行多个nb模型时,不同nb以标签为界限: ```[network] ./network_binary.nb [input] ./iter_0_images_262_out0_1_3_640_640.tensor [network] ./network_binary.nb [input] ./input_0.dat常见问题[color=rgba(0, 0, 0, 0.87)]① 按照官网上的教程在V853上部署 lenet 模型,使用 vpm_run sample.txt 的时候出现segmentation fault ,如下图所示 [color=rgba(0, 0, 0, 0.87)] [color=var(--md-typeset-a-color)]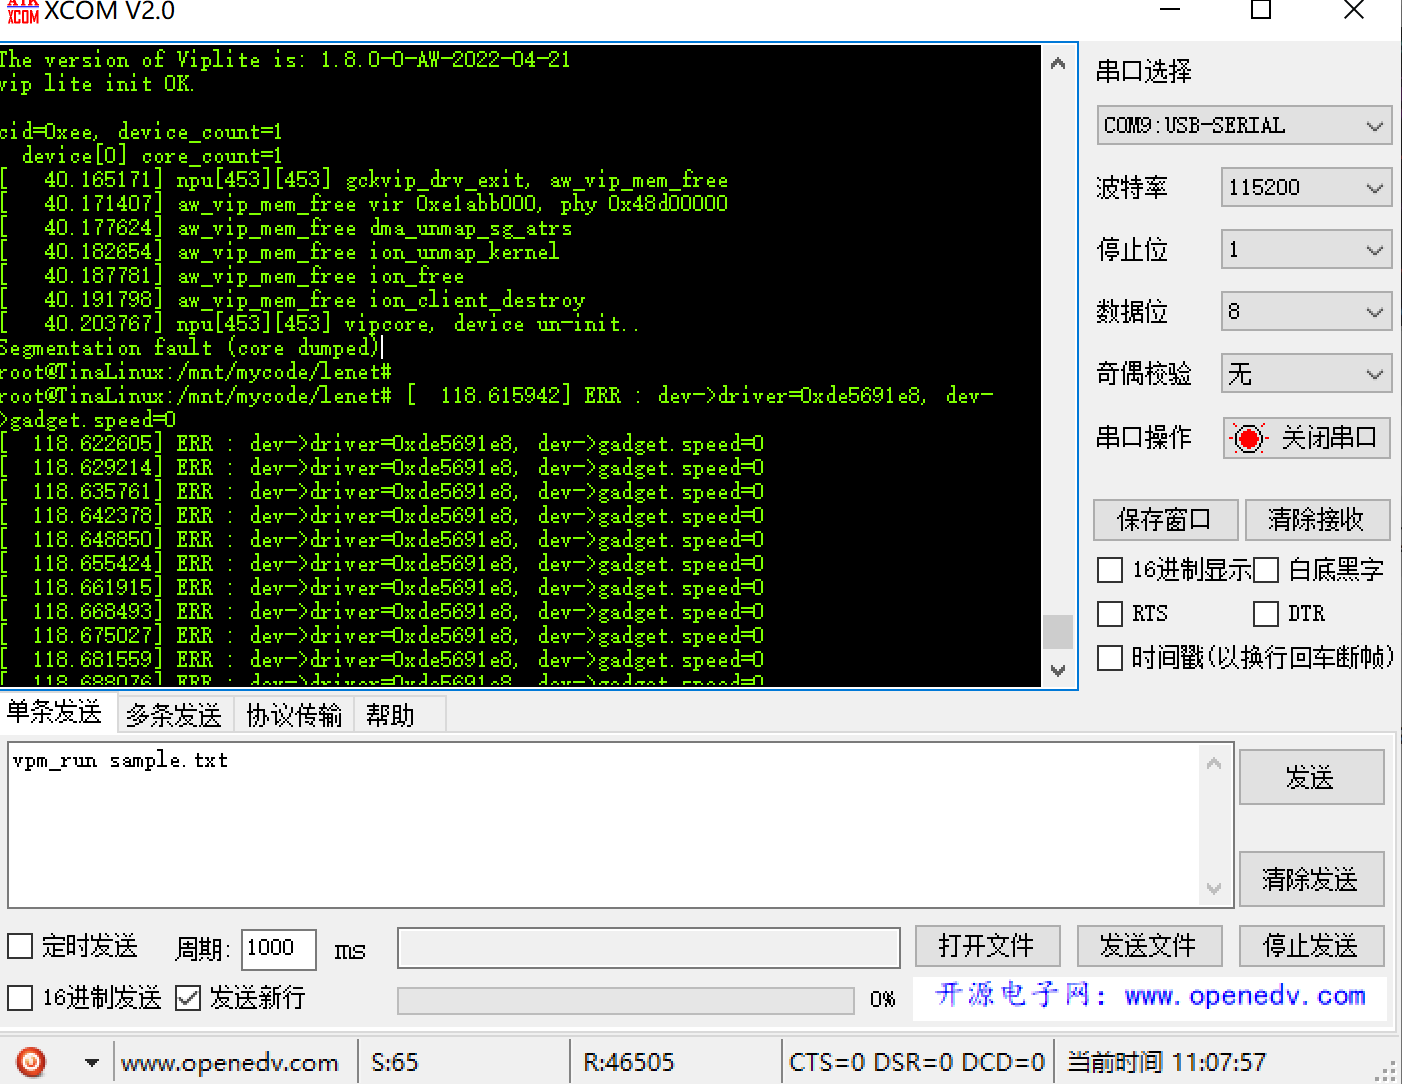 [color=rgba(0, 0, 0, 0.87)]读取sample.txt失败,检查一下vpm_run.c源码,查看获取文件名的换行符类型。 [color=rgba(0, 0, 0, 0.87)]尝试将把sample.txt文件中的空格去掉,这是导致segmentation fault错误的原因之一。 [color=rgba(0, 0, 0, 0.87)]windows操作系统的换行为:CR/LF或\r\n,而Linux的换行符为LF或\n。 [color=rgba(0, 0, 0, 0.87)]② NPU模块vpm_run例程运行时sample.txt读取错误 [color=rgba(0, 0, 0, 0.87)]编写sample.txt文件: [color=rgba(0, 0, 0, 0.87)]``` [network] ./network_binary.nb [input] ./iter_0_images_262_out0_1_3_640_640.tensor code" style="box-sizing: inherit; -webkit-tap-highlight-color: transparent; font-size: inherit; font-family: inherit; background-image: initial; background-position: initial; background-size: initial; background-repeat: initial; background-attachment: initial; background-origin: initial; background-clip: initial; border-width: 0px; border-style: initial; border-color: initial; position: absolute; top: 0.5em; right: 0.5em; z-index: 1; width: 1.5em; height: 1.5em; border-radius: 0.1rem; outline: none; outline-offset: 0.1rem; cursor: pointer; transition: color 0.25s ease 0s;">将模型、输入文件、vpm_run例程传入板端运行vpm_run例程:[color=rgba(0, 0, 0, 0.87)]./vpm_run -s sample.txt code" style="box-sizing: inherit; -webkit-tap-highlight-color: transparent; font-size: inherit; font-family: inherit; background-image: initial; background-position: initial; background-size: initial; background-repeat: initial; background-attachment: initial; background-origin: initial; background-clip: initial; border-width: 0px; border-style: initial; border-color: initial; position: absolute; top: 0.5em; right: 0.5em; z-index: 1; width: 1.5em; height: 1.5em; border-radius: 0.1rem; outline: none; outline-offset: 0.1rem; cursor: pointer; transition: color 0.25s ease 0s;">报错LOG如下:[color=rgba(0, 0, 0, 0.87)]unsupported input file type=tenso. error input file type segmentation fault ``` [color=rgba(0, 0, 0, 0.87)]报错为读取sample.txt失败,检查一下vpm_run.c源码,查看获取文件名的换行符类型,多是由于空格字符问题引起。
|