- #include <zephyr/kernel.h>
- #include <zephyr/drivers/gpio.h>
- /* 1000 msec = 1 sec */
- #define SLEEP_TIME_MS 1000
- // 定义设备
- #define LED0_NODE DT_ALIAS(led0)
- #define LED1_NODE DT_ALIAS(led1)
- // 定义设备变量
- static const struct gpio_dt_spec led0 = GPIO_DT_SPEC_GET(LED0_NODE, gpios);
- static const struct gpio_dt_spec led1 = GPIO_DT_SPEC_GET(LED1_NODE, gpios);
- int main(void)
- {
- int ret;
- // 初始化检查
- if (!gpio_is_ready_dt(&led0)) {
- return 0;
- }
- ret = gpio_pin_configure_dt(&led0, GPIO_OUTPUT_ACTIVE);
- if (ret < 0) {
- return 0;
- }
- if (!gpio_is_ready_dt(&led1)) {
- return 0;
- }
- ret = gpio_pin_configure_dt(&led1, GPIO_OUTPUT_ACTIVE);
- if (ret < 0) {
- return 0;
- }
- // 设置初始状态:低电平
- ret = gpio_pin_set_dt(&led0, 0);
- if (ret < 0) {
- return 0;
- }
- // 设置初始状态:高电平
- ret = gpio_pin_set_dt(&led1, 1);
- if (ret < 0) {
- return 0;
- }
- while (1) {
- // 翻转状态
- ret = gpio_pin_toggle_dt(&led0);
- if (ret < 0) {
- return 0;
- }
- // 翻转状态
- ret = gpio_pin_toggle_dt(&led1);
- if (ret < 0) {
- return 0;
- }
- k_msleep(SLEEP_TIME_MS);
- }
- return 0;
- }
上述代码的逻辑,非常明确,具体步骤如下:
- 通过宏定义DT_ALIAS 和设备别名,快速定位设备
- 通过宏定义 GPIO_DT_SPEC_GET ,设置设备变量
- 通过 gpio_is_ready_dt() 检查GPIO是否准备好
- 通过gpio_pin_configure_dt()配置输入输出状态
- 通过gpio_pin_set_dt()设置GPIO的状态
- 通过gpio_pin_toggle_dt()翻转GPIO的状态
- 在循环中,没翻转一次状态,就通过k_msleep()延时SLEEP_TIME_MS对应的时间
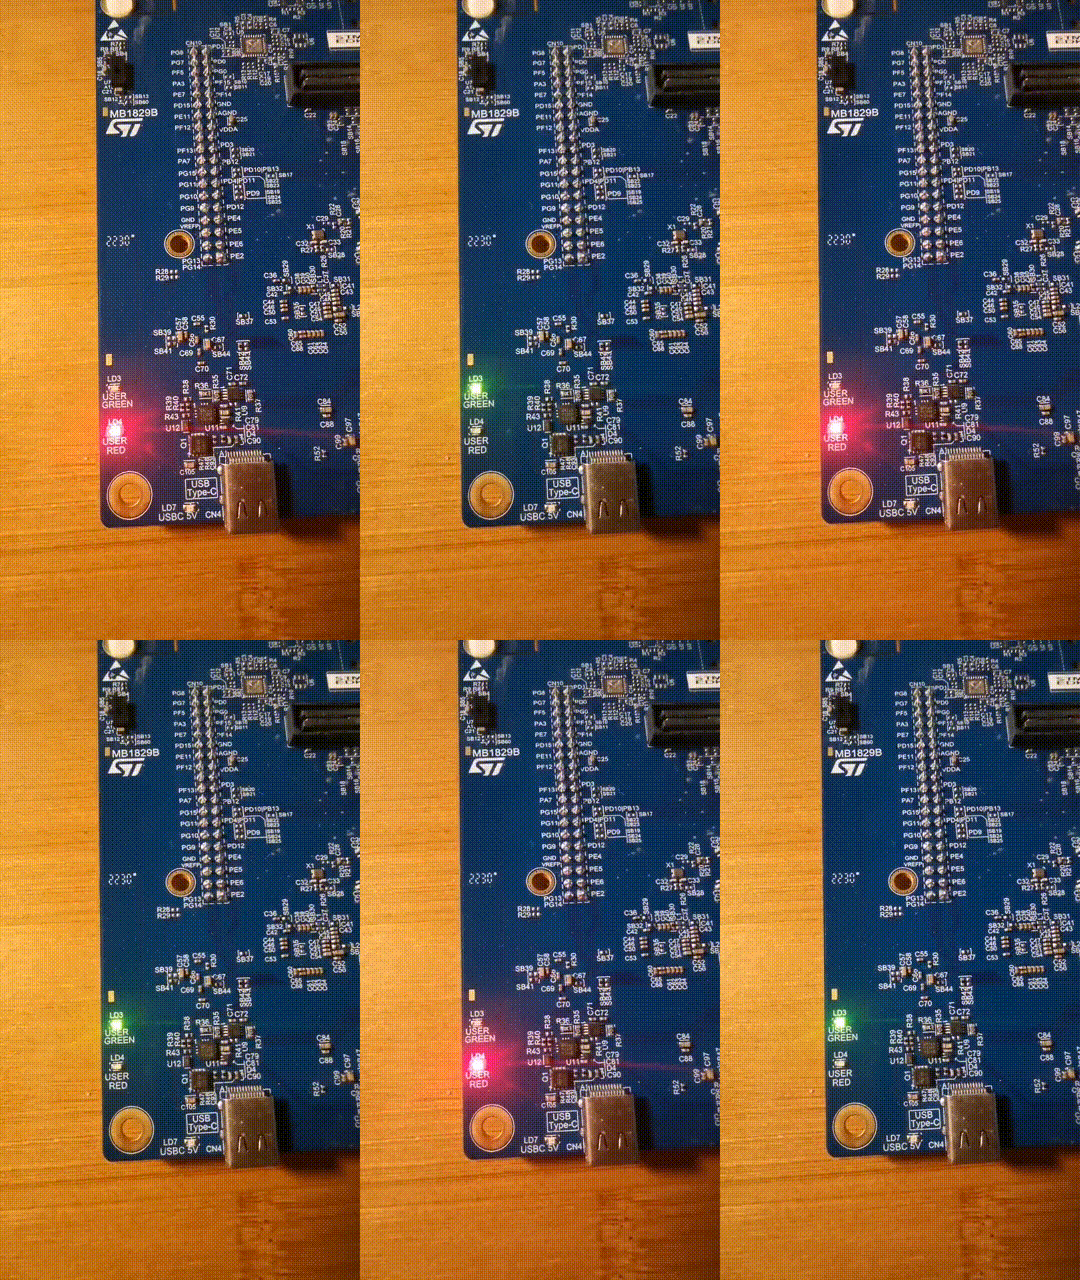
因为设置了两个灯的初始状态,一个是点亮,一个是熄灭,所以在循环中,翻转状态后,两个灯就形成交替亮灭的实际表现了。
上述代码,参考samples/basic/blinky进行,做好对应的prj.conf、CMakeLists.txt配置,然后使用下面的命令编译:
- west build -p=always -b stm32u5a9j_dk
也可以使用pyocd烧录:
- pyocd flash --erase chip --target stm32u5a5zjtxq build/zephyr/zephyr.hex
烧录完成后,运行效果如下:

四、按键控制翻转的速度
下一步,我们把按键的功能,给添加进来,用按键控制交替的速度,也就是延时的时间,每按键一次,则延时时间变短,交替速度变快。
具体的代码如下:
- #include <zephyr/kernel.h>
- #include <zephyr/drivers/gpio.h>
- /* 1000 msec = 1 sec */
- #define SLEEP_TIME_MS 1000
- #define SLEEP_TIME_MS_MIN 100
- #define LED0_NODE DT_ALIAS(led0)
- #define LED1_NODE DT_ALIAS(led1)
- #define SW0_NODE DT_ALIAS(sw0)
- static const struct gpio_dt_spec button = GPIO_DT_SPEC_GET_OR(SW0_NODE, gpios,
- {0});
- static struct gpio_callback button_cb_data;
- int sleep_time = SLEEP_TIME_MS;
- static const struct gpio_dt_spec led0 = GPIO_DT_SPEC_GET(LED0_NODE, gpios);
- static const struct gpio_dt_spec led1 = GPIO_DT_SPEC_GET(LED1_NODE, gpios);
- bool push_status = true;
- void button_pressed(const struct device *dev, struct gpio_callback *cb,
- uint32_t pins)
- {
- if (push_status) {
- return;
- }
- push_status = true;
- printk("Button pressed at %" PRIu32 "\n", k_cycle_get_32());
- sleep_time -= 100;
- if (sleep_time<SLEEP_TIME_MS_MIN) {
- sleep_time = SLEEP_TIME_MS;
- }
- printk("Sleep time is at %d\n", sleep_time);
- push_status = false;
- }
- int main(void)
- {
- int ret;
- if (!gpio_is_ready_dt(&button)) {
- printk("Error: button device %s is not ready\n",
- button.port->name);
- return 0;
- }
- ret = gpio_pin_configure_dt(&button, GPIO_INPUT);
- if (ret != 0) {
- printk("Error %d: failed to configure %s pin %d\n",
- ret, button.port->name, button.pin);
- return 0;
- }
- ret = gpio_pin_interrupt_configure_dt(&button,
- GPIO_INT_EDGE_TO_ACTIVE);
- if (ret != 0) {
- printk("Error %d: failed to configure interrupt on %s pin %d\n",
- ret, button.port->name, button.pin);
- return 0;
- }
- gpio_init_callback(&button_cb_data, button_pressed, BIT(button.pin));
- gpio_add_callback(button.port, &button_cb_data);
- printk("Set up button at %s pin %d\n", button.port->name, button.pin);
- if (!gpio_is_ready_dt(&led0)) {
- return 0;
- }
- ret = gpio_pin_configure_dt(&led0, GPIO_OUTPUT_ACTIVE);
- if (ret < 0) {
- return 0;
- }
- if (!gpio_is_ready_dt(&led1)) {
- return 0;
- }
- ret = gpio_pin_configure_dt(&led1, GPIO_OUTPUT_ACTIVE);
- if (ret < 0) {
- return 0;
- }
- ret = gpio_pin_set_dt(&led0, 0);
- if (ret < 0) {
- return 0;
- }
- ret = gpio_pin_set_dt(&led1, 1);
- if (ret < 0) {
- return 0;
- }
- push_status = false;
- while (1) {
- ret = gpio_pin_toggle_dt(&led0);
- if (ret < 0) {
- return 0;
- }
- ret = gpio_pin_toggle_dt(&led1);
- if (ret < 0) {
- return 0;
- }
- k_msleep(sleep_time);
- }
- return 0;
- }
在上述代码中,按键处理的核心部分如下:
1. 定义:
- #define SW0_NODE DT_ALIAS(sw0)
- static const struct gpio_dt_spec button = GPIO_DT_SPEC_GET_OR(SW0_NODE, gpios,
- {0});
- static struct gpio_callback button_cb_data;
- static const struct gpio_dt_spec led0 = GPIO_DT_SPEC_GET(LED0_NODE, gpios);
- static const struct gpio_dt_spec led1 = GPIO_DT_SPEC_GET(LED1_NODE, gpios);
2. 按键按下后的处理
- int sleep_time = SLEEP_TIME_MS;
- bool push_status = true;
- void button_pressed(const struct device *dev, struct gpio_callback *cb,
- uint32_t pins)
- {
- if (push_status) {
- return;
- }
- push_status = true;
- printk("Button pressed at %" PRIu32 "\n", k_cycle_get_32());
- sleep_time -= 100;
- if (sleep_time<SLEEP_TIME_MS_MIN) {
- sleep_time = SLEEP_TIME_MS;
- }
- printk("Sleep time is at %d\n", sleep_time);
- push_status = false;
- }
在这个调用中,会递减延时时间sleep_time,直到最小值后,再从最大值开始,往复循环。
3. 按键初始化检查和回调配置
- if (!gpio_is_ready_dt(&button)) {
- printk("Error: button device %s is not ready\n",
- button.port->name);
- return 0;
- }
- ret = gpio_pin_configure_dt(&button, GPIO_INPUT);
- if (ret != 0) {
- printk("Error %d: failed to configure %s pin %d\n",
- ret, button.port->name, button.pin);
- return 0;
- }
- ret = gpio_pin_interrupt_configure_dt(&button,
- GPIO_INT_EDGE_TO_ACTIVE);
- if (ret != 0) {
- printk("Error %d: failed to configure interrupt on %s pin %d\n",
- ret, button.port->name, button.pin);
- return 0;
- }
- gpio_init_callback(&button_cb_data, button_pressed, BIT(button.pin));
- gpio_add_callback(button.port, &button_cb_data);
- printk("Set up button at %s pin %d\n", button.port->name, button.pin);
4. 循环部分使用设置的延时时间:
- push_status = false;
- while (1) {
- ret = gpio_pin_toggle_dt(&led0);
- if (ret < 0) {
- return 0;
- }
- ret = gpio_pin_toggle_dt(&led1);
- if (ret < 0) {
- return 0;
- }
- k_msleep(sleep_time);
- }
5. 实际效果
将上述代码保存后,然后编译烧录,实际运行的效果如下。
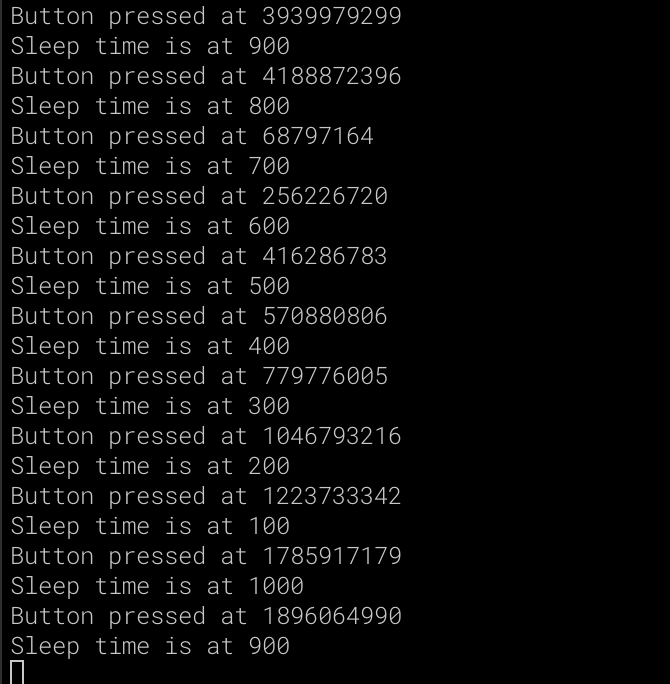
首先我们看一下串口的输出:

可以看到,按键一下,则sleep time就减少100,低于100,则回到1000。单位为ms。
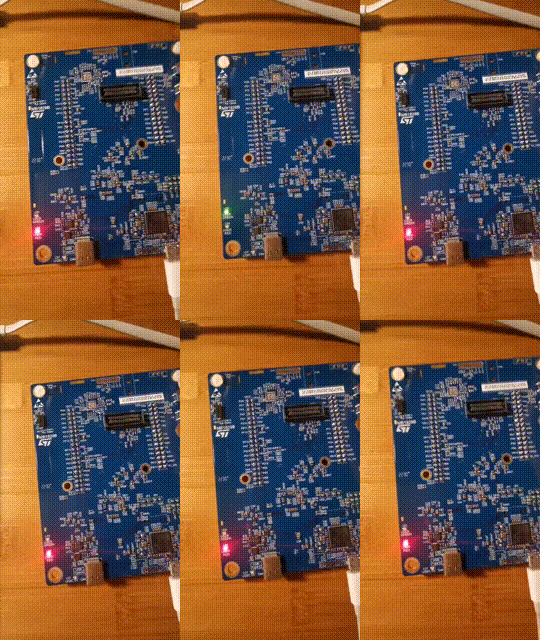
LED灯实际闪烁的效果如下:

五、总结
好了,点灯和按键的处理,就到这里了。
感兴趣的话,还可以试试通过按键,进行PWM调光,也就是控制LED的亮点效果。