- CAN_USER_CONFIG_T g_canConfig = {
- .maxMbNumber = 3, /* 2 Rx MBs and 1 Tx MB */
- .operationMode = CAN_MODE_NORMAL,//CAN_MODE_LOOPBACK,
- .rxFifoEnable = false,
- .rxFifoFilterNum = CAN_RXFIFO_ID_FILTERS_8,
- .rxFifoTransferType = CAN_RXFIFO_USE_INTERRUPT,
- .rxFifoDmaChannel = 0,
- .fdEnable = false,
- .fdPayloadSize = CAN_FD_PAYLOAD_SIZE_16,
- .clockSource = CAN_CLOCK_SOURCE_OSC,
- .bitrate = {
- .preDiv = 1,
- .propSeg = 7,
- .phaseSeg1 = 4,
- .phaseSeg2 = 1,
- .resyncJumpWidth = 3
- },
- .fdBitrate = {
- .preDiv = 0,
- .propSeg = 0,
- .phaseSeg1 = 0,
- .phaseSeg2 = 0,
- .resyncJumpWidth = 0
- }
- };
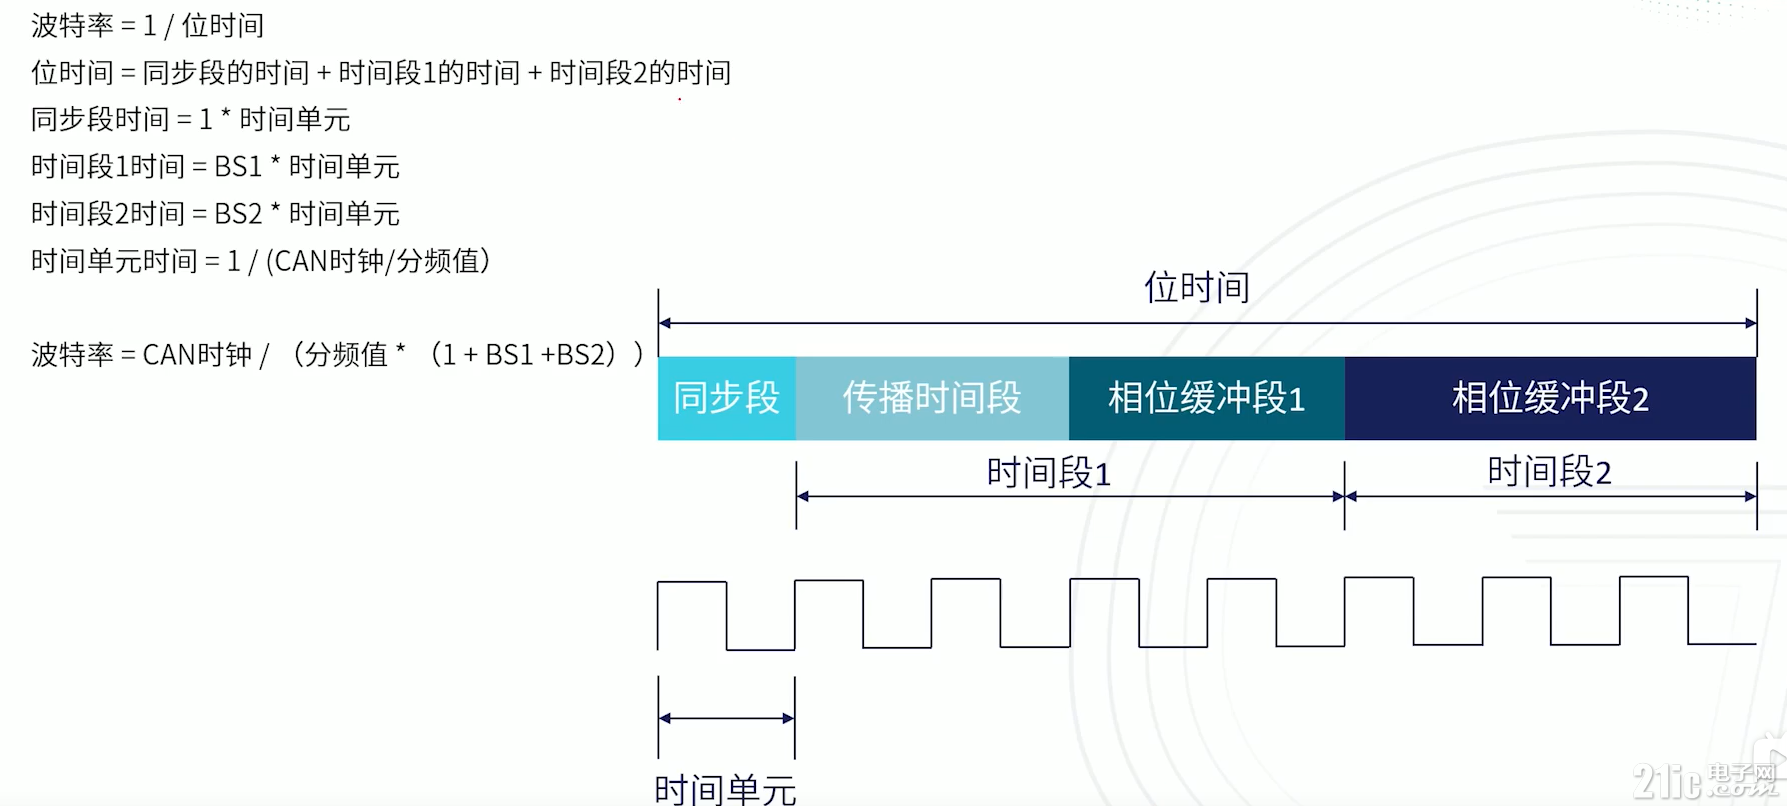
关于波特率,原理参见下图,这里波特率是250kbps,对于CAN来说,已经算高速CAN。
 手册里给了计算公式:

bitrate=8000000/{[(1+(4+1)+(1+1)+(7+1)]*(1+1)}=8000000/32=250000
2、CAN初始化
- /* Initialize the CAN controller, bitrate is 250K */
- CAN_Init(CAN0_INSTANCE, &canState, &g_canConfig);
配置发送报文缓存
- /* Configure Tx MB */
- CAN_DATA_INFO_T txMbInfo = {
- .msgIdType = CAN_ID_STANDARD, /* Standard CAN ID */
- .dataLen = 8, /* Used only to initialize the MB, will be updated when send data */
- .fdEnable = false, /* Disable CAN FD */
- .isRemote = false
- };
- CAN_ConfigureTxMb(CAN0_INSTANCE, TX_MB, &txMbInfo, 0);
- /* Use individual Rx masking for the MBs */
- CAN_SetRxMaskType(CAN0_INSTANCE, CAN_RX_MASK_INDIVIDUAL);
- /* Configure Rx MB0, it will receive standard frames with ID 1 */
- CAN_DATA_INFO_T rxMb0Info = {
- .msgIdType = CAN_ID_STANDARD, /* Standard CAN ID */
- .dataLen = 8, /* Max data length for classic CAN is 8 bytes */
- .fdEnable = false, /* Disable CAN FD */
- .isRemote = false
- };
- CAN_ConfigureRxMb(CAN0_INSTANCE, RX_MB_0, &rxMb0Info, RX_CAN_MESSAGE_ID);
- CAN_SetRxIndividualMask(CAN0_INSTANCE, CAN_ID_STANDARD, RX_MB_0, 0xFFFFFFFF);
CAN_ID_STANDARD:11位识别码
3、CAN中断回调函数
在MB0接收到数据后,设置接收标识为真。
- void CanEventCallback(
- uint8_t instance,
- CAN_EVENT_TYPE_T eventType,
- uint32_t mbIndex,
- CAN_STATE_T *driverState)
- {
- /* A frame was received in the configured Rx MB */
- if (eventType == CAN_EVENT_RX_COMPLETE)
- {
- /* Set the receive complete flags */
- if (mbIndex == RX_MB_0)
- {
- g_mb0ReceiveCompleted = true;
- }
- }
- }
接收到id为888u的数据,打印出来,翻转LED。这里其实不用判断ID,因为如果ID不是888u,ECU1是无法接收的。
- while (!exit)
- {
- /* Reset the receive complete flags */
- g_mb0ReceiveCompleted = false;
- g_mb1ReceiveCompleted = false;
- /* Start non-blocking receiving */
- CAN_ReceiveNonBlocking(CAN0_INSTANCE, RX_MB_0, &rxFrame0);
- CAN_ReceiveNonBlocking(CAN0_INSTANCE, RX_MB_1, &rxFrame1);
- /* Wait until one of the MBs received a CAN frame */
- while ((g_mb0ReceiveCompleted == false)
- && (g_mb1ReceiveCompleted == false));
-
- if(g_mb0ReceiveCompleted==true){
- if(rxFrame0.messageId==888U){
- for(i=0;i<rxFrame0.dataLen;i++){
- printf("0x%02X,",rxFrame0.data[i]);
- }
- printf("\r\n");
- LED_Toggle(LED_RED);
- }
- }
- }
三、ECU2程序
MM32的部分简单写一下:
1、初始化
波特率250kbps,配置了几个发送用MB
- ...
- FLEXCAN_GetDefaultConfig(&FlexCAN_ConfigStruct);
- FlexCAN_ConfigStruct.baudRate = 250000; /* 250kbps */
- FlexCAN_ConfigStruct.clkSrc = Enum_Flexcan_ClkSrc1;
- FlexCAN_ConfigStruct.enableLoopBack = false;
- FlexCAN_ConfigStruct.disableSelfReception = true;
- FlexCAN_ConfigStruct.enableIndividMask = true;
- FLEXCAN_Init(FLEXCAN, &FlexCAN_ConfigStruct);
-
- FLEXCAN_TxMbConfig(FLEXCAN, 7, ENABLE);
- FLEXCAN_TxMbConfig(FLEXCAN, 8, ENABLE);
- FLEXCAN_TxMbConfig(FLEXCAN, 9, ENABLE);
- FLEXCAN_TransferCreateHandle(FLEXCAN, &FlexCAN_Handle, FlexCAN_Transfer_Callback, NULL);
- ...
2、while(1)
- uint8_t Buffer[8] = {0x00, 0x22, 0x33, 0x44, 0x55, 0x66, 0x77, 0x88};
- printf("\r\nTest %s", __FUNCTION__);
- FlexCAN_Configure();
- FlexCAN_SendStandardFrameMessage(888U, Buffer, sizeof(Buffer));
- while (1)
- {
- PLATFORM_LED_Toggle(LED1);
- FlexCAN_SendStandardFrameMessage(888U, Buffer, sizeof(Buffer));
- PLATFORM_DelayMS(1000);
- }
每隔1秒,向ID为888U(ECU1)发送buffer内容。

对应CAN报文:
识别码:888U
DLC:8
数据码:0x00, 0x22, 0x33, 0x44, 0x55, 0x66, 0x77, 0x88
四、运行效果
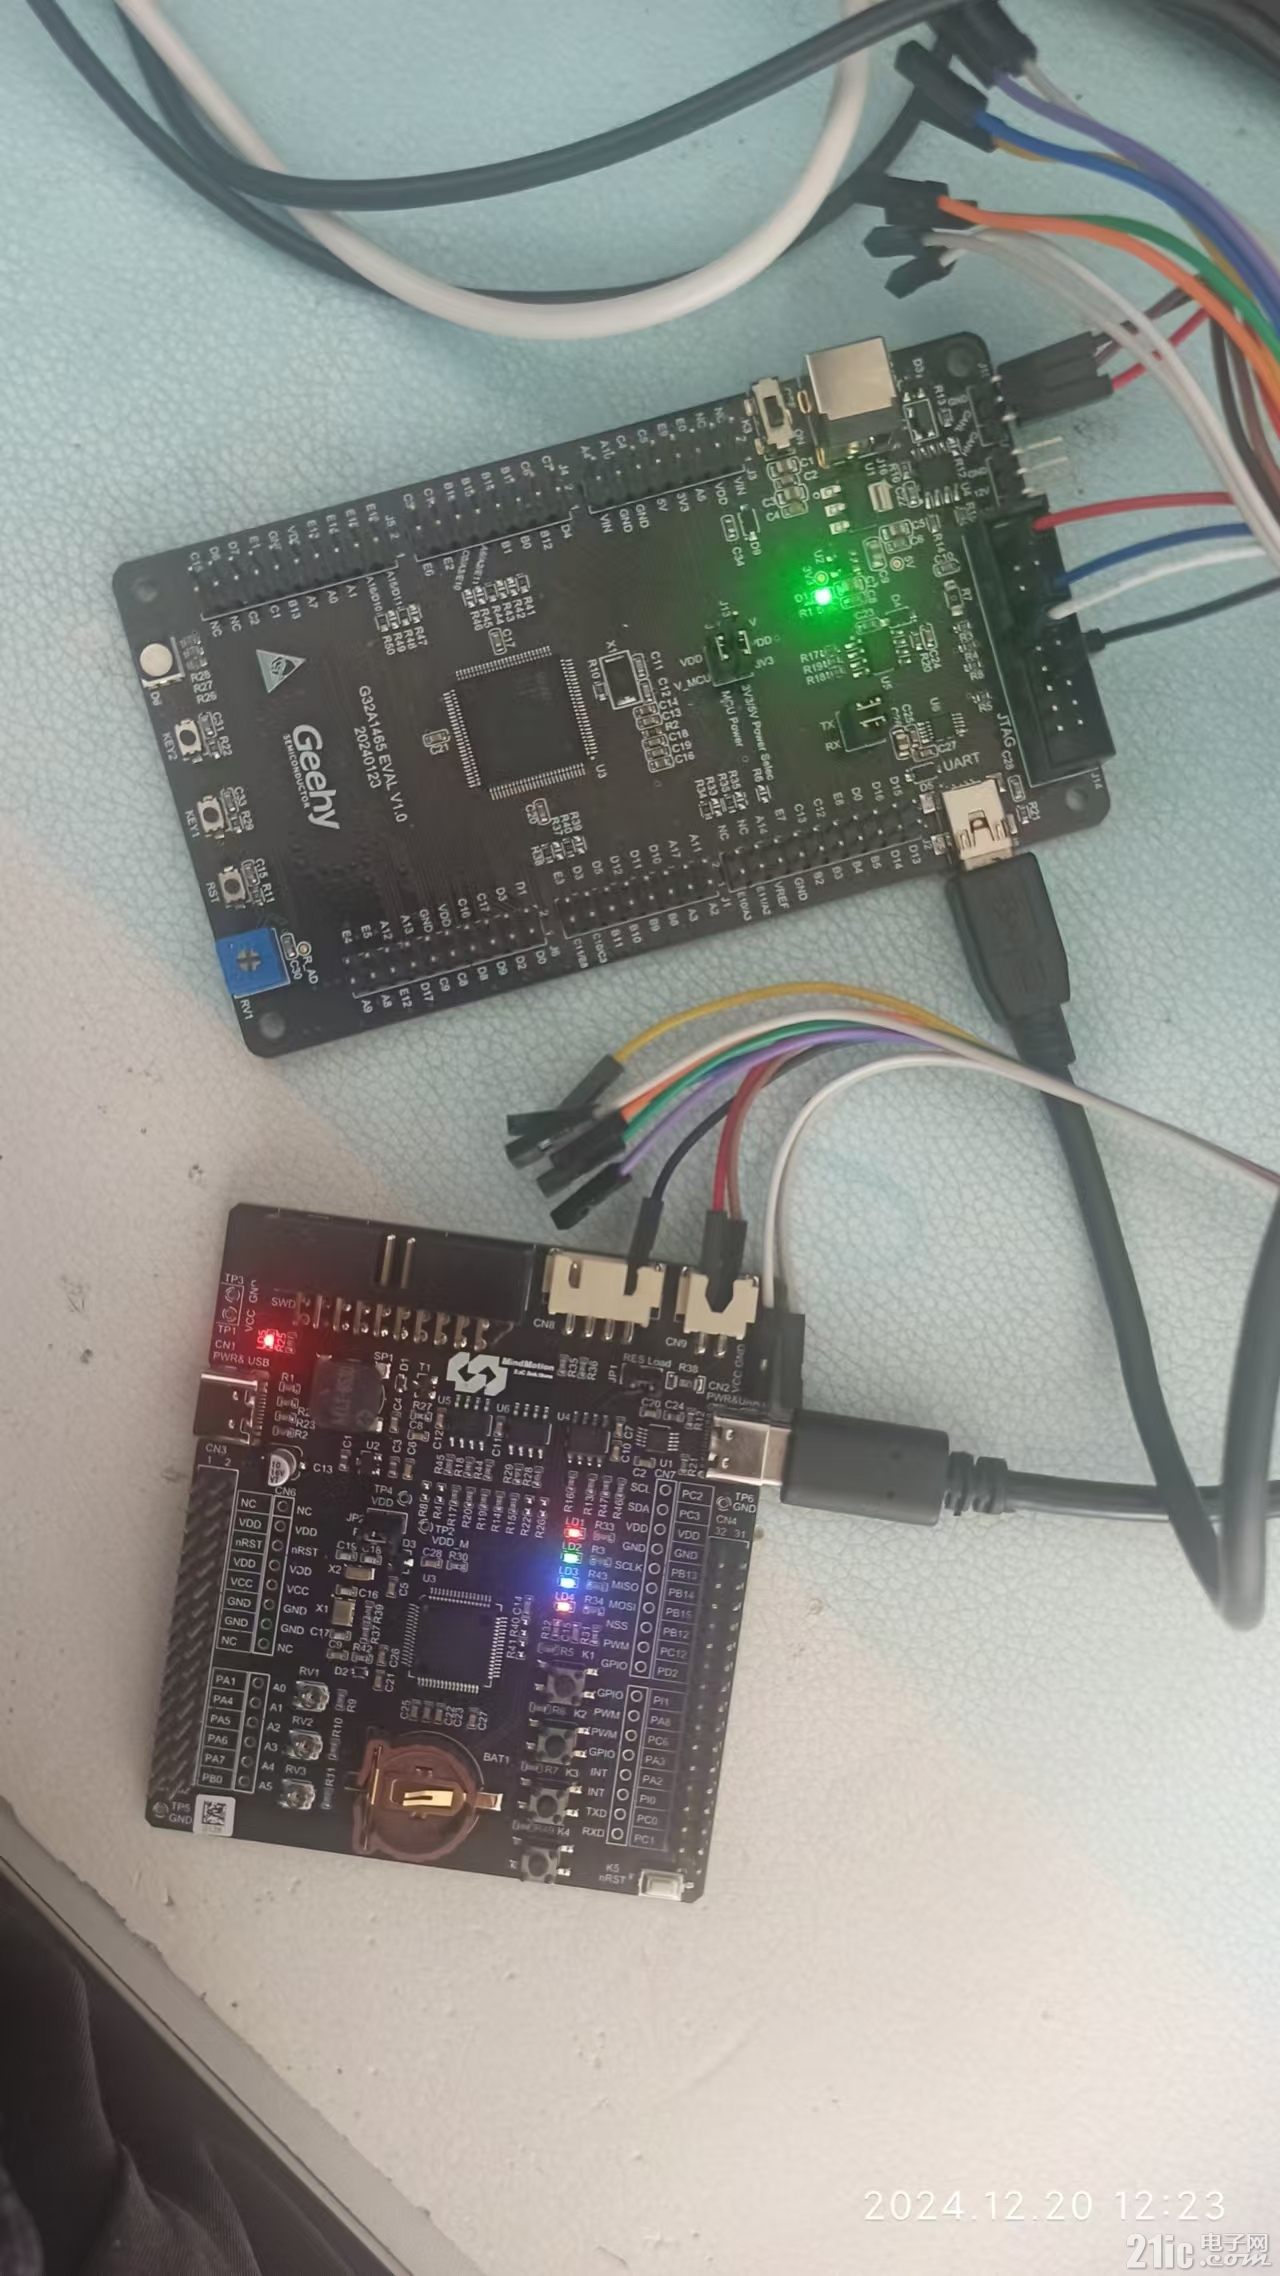
1、连线

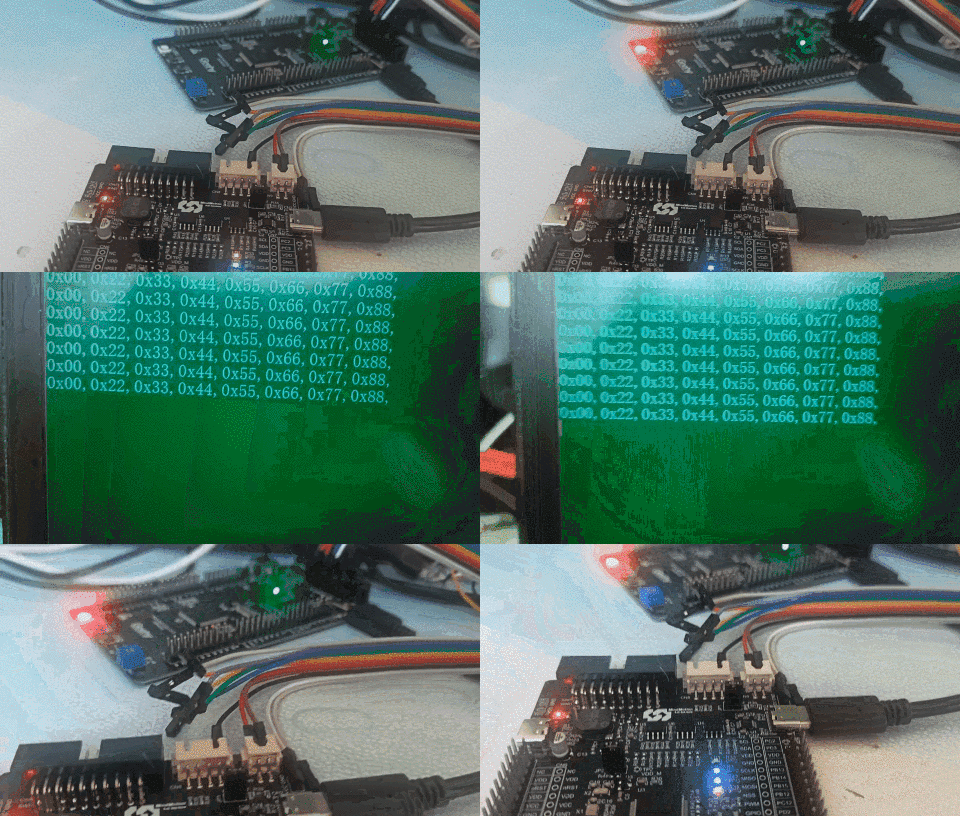
2、收到CAN数据LED_RED翻转,串口打印收到的信息
